-

Google Play -

Amazon Appstore -

SamsungApps
Tutorial
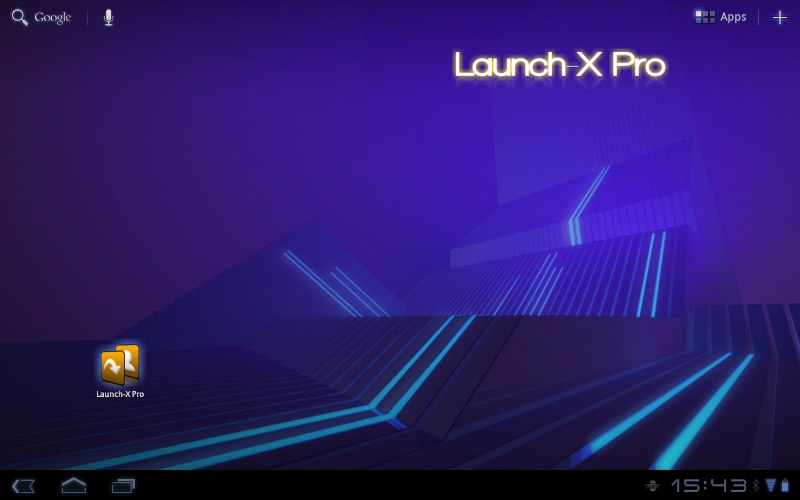
Android 3.0
Here is a simple tutorial/guide that describes how to use Launch-X.
Launch-X is composed of two parts:
- Application
- Widget
In the Launch-X application you can create/edit/delete widgets by using the Widget Editor. Once you are done configuring your widget, you can add it to your homescreen as you would do with any other widget (long-press your homescreen, select 'Widgets', and then 'Launch-X').
Let's see, step-by-step, how to create a Launch-X widget, add some items (applications, contacts and generic shortcuts) to it, customize the widget, and finally add it to the homescreen.
Creating a Launch-X Widget
First of all, start the Launch-X application.
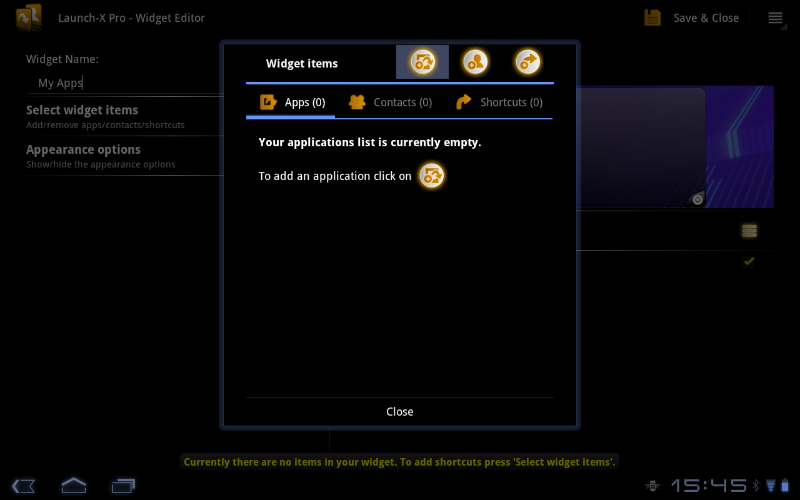
The main screen of Launch-X will contain the list of all your created widgets. When it is empty, a short usage description is shown (as you can see in the screenshot).
To create our first widget, simply press 'Create Widget'.

The Widget Editor will appear, where you can customize your widget.
Enter a name (it is optional, though it will be easier to find later that widget if you create more than one), like "My Apps", or "Tools", "Games", etc.
To add new items to the widget, simply press 'Select widget items'.

In the new screen (the 'Widget Items Editor') you can add items to the widget: applications, contacts or generic shortcuts.
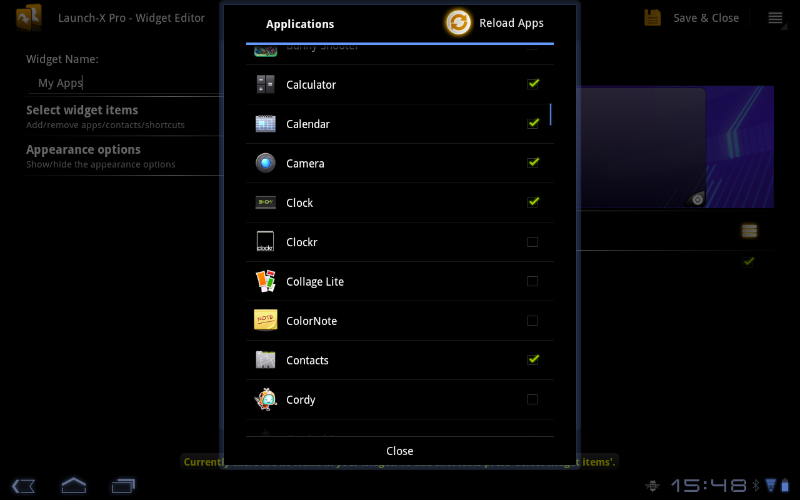
To add an application press the indicated 'Add apps' icon.
The installed applications list will be loaded (it can take a while the first time, depending on your device and on how many apps you have, but you won't have to wait the next time this list is loaded).
Now select the apps you want to add to the widget, and when done, press the 'back' button.
If you'd like to remove some items simply click on them and select 'Delete'.
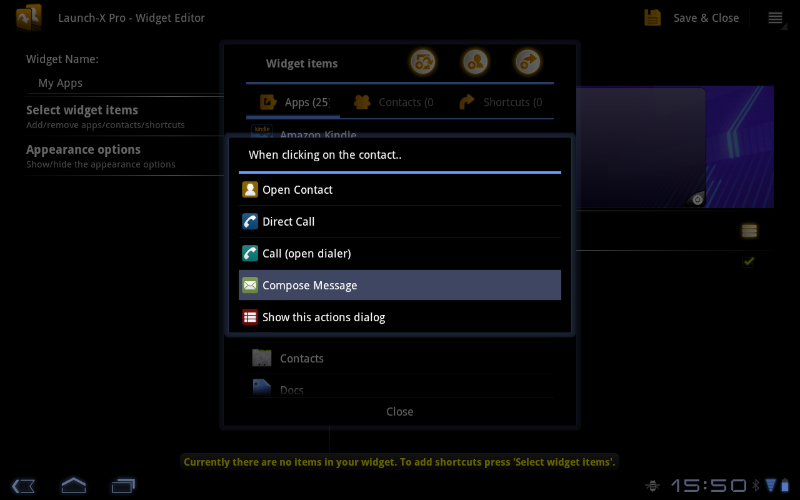
It is also possible to add Contacts to your widget. As for applications, press the indicated 'Add contact' icon. The list of contacts will be shown.
When you select a contact a dialog will popup letting you decide the action to take when later this item is clicked on the widget:
- Open Contact opens the contact using the default contact viewer on your phone.
- Direct Call starts immediately a call to the selected contact.
- Call (open dialer) opens your phone dialer with the contact's phone number.
- Compose Message starts your default messaging app and creates a new text-message that can be sent to that contact.
- Show this actions dialog When clicking on a contact, this list of actions will be shown so that you can easily perform all the available actions.
You can still change the selected action by pressing your contact and selecting 'Edit Action'.
Let's add to this widget also a couple of 'Shortcuts'. Again, press the indicated 'Add shortcut' icon.
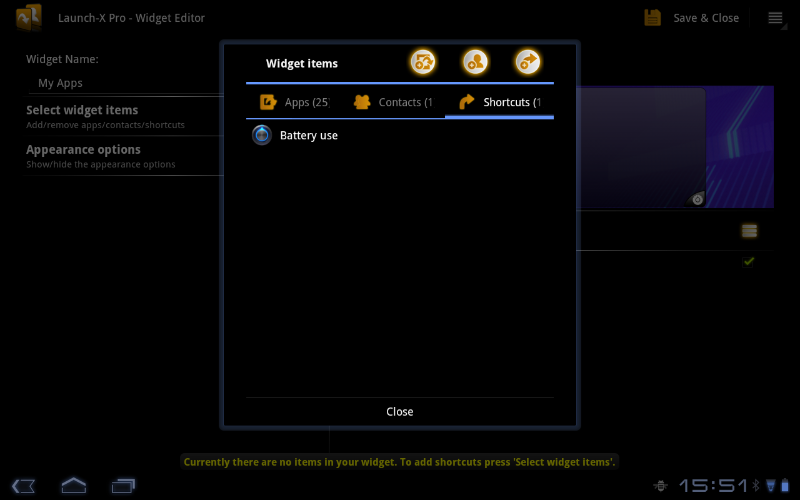
At this point you can press the 'Close' button, which will take you back to the Widget Editor, where you can see now in the widget preview the added items.
In this example we have selected 27 items and, with the current widget configurations, Launch-X created for us 6 screens. We can cycle
through them by pressing the direct buttons.
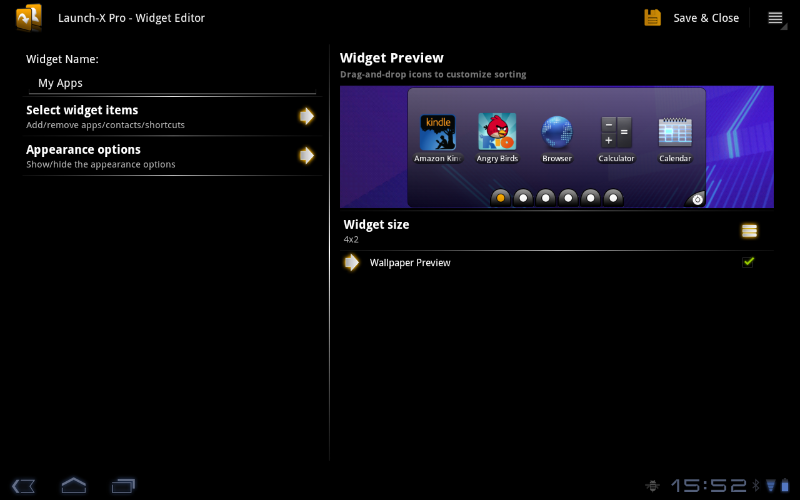
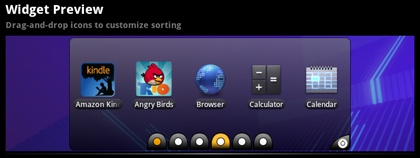
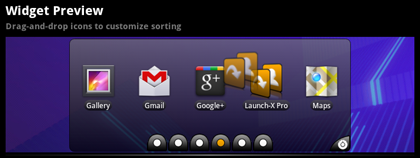
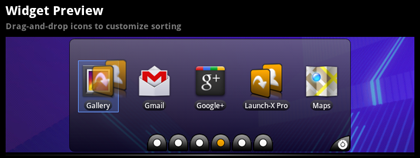
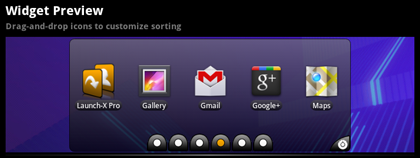
In the widget preview you can also change the order of your items by using simple drag-and-drop.
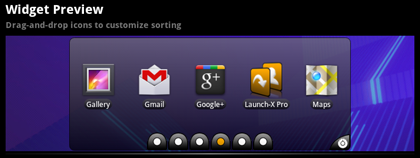
In the screenshots below I'm moving the "Launch-X Pro" item to the left. Touch (and hold) the icon and drag it to your desired position, then release it.
To move an item from one screen to the other drag the icon over the borders (left or right) of the widget.
The screen will flip while you are still holding the icon, release at your desired position.
Now let's start customizing the Launch-X Widget.
Widget Size
You can modify the current widget size by pressing on 'Widget Size'.
Note: the widget size selected here only applies to the Widget Preview. The real widget size will be determined when actually adding the widget to the homescreen.
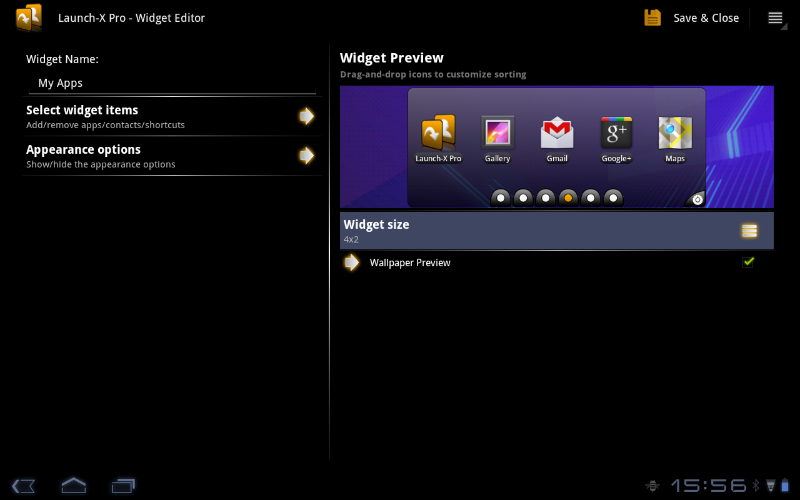
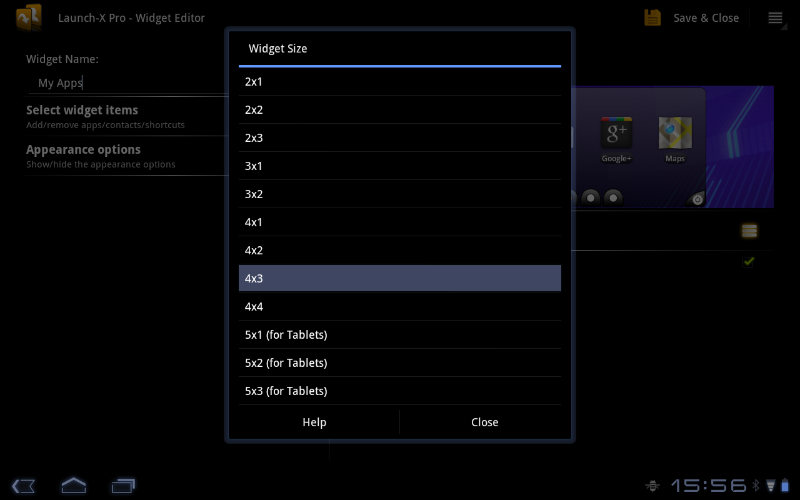
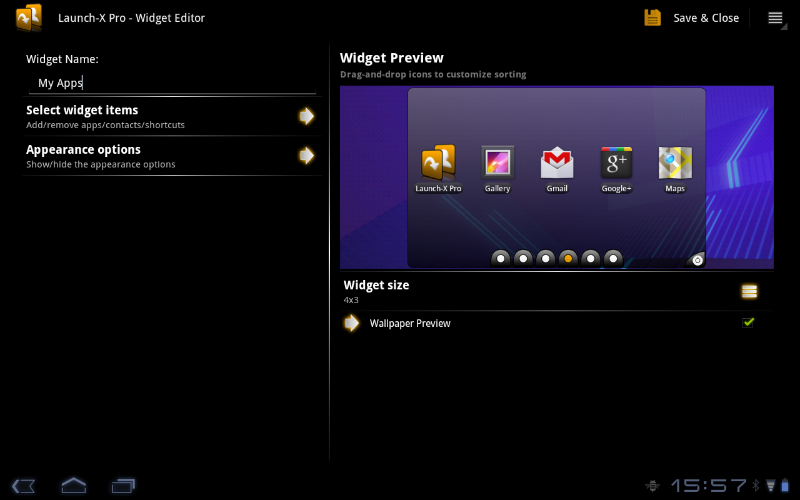
In this example I've selected a '4x3' widget. You can play around with the various sizes to see which one fits your needs.
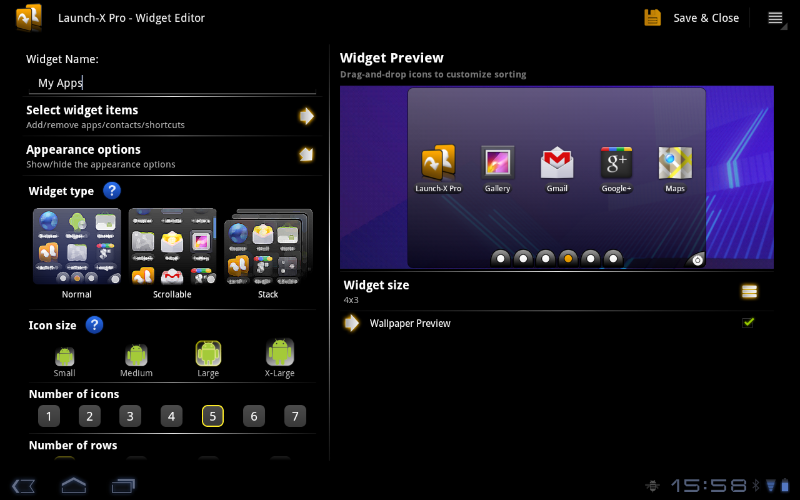
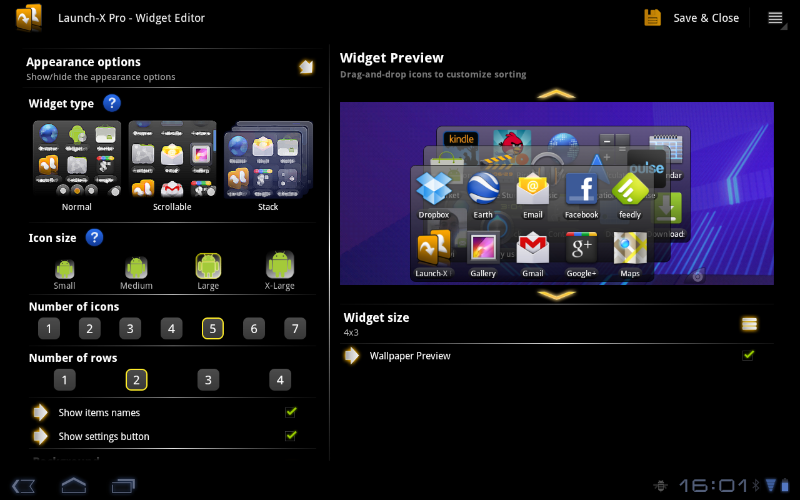
Appearance Options
Select "Appearance options" to show the available widget configuration options:

- Scrollable widget enable to make the widget scrollable (instead of using arrows or direct buttons). Note: to use such widgets you need a Homescreen Launcher that supports those (such as ADW Launcher, LauncherPro, GO Launcher, etc.). Remember also that HTC Sense and other manufacturers homescreens unfortunately do not support 3rd party scrollable widgets. Such homescreens often provide their own scrollable widgets, but without exposing to developers any public API.
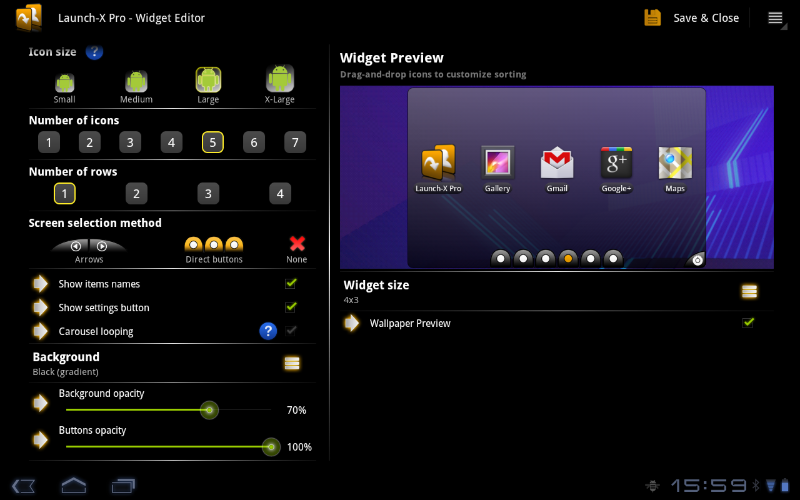
- Icon size Select your preferred icon size (among 'Small', 'Medium', 'Large' and 'X-Large'). Please note that the actual size of the icons might shrink depending on the other widget's configurations. For example, if you create a 3x1 widget with 7 large icons per row the real size will be smaller to fit the items.
- Number of icons Here you can select how many items to have on each row.
- Number of rows Here you can select how many rows to have in each Launch-X Widget screen.
-
Screen selection method Select the method to use to cycle through screens:
- Arrows use a left and right button to move between screens.
- Direct buttons use a dedicated button for each screen. The direct buttons allow you to reach your desired screen much quicker.
- None completely hide the arrows or direct buttons. This method is useful if you want to create a nice-looking widget with a single screen.
- Show items names Choose whether to show or hide the names of the items under the icons.
- Reduce text size in landscape mode If you want to keep the items names with a normal font size uncheck this setting.
- Show settings button Choose whether to show or hide the settings button. The settings button allows to quickly modify an existing Launch-X widget.
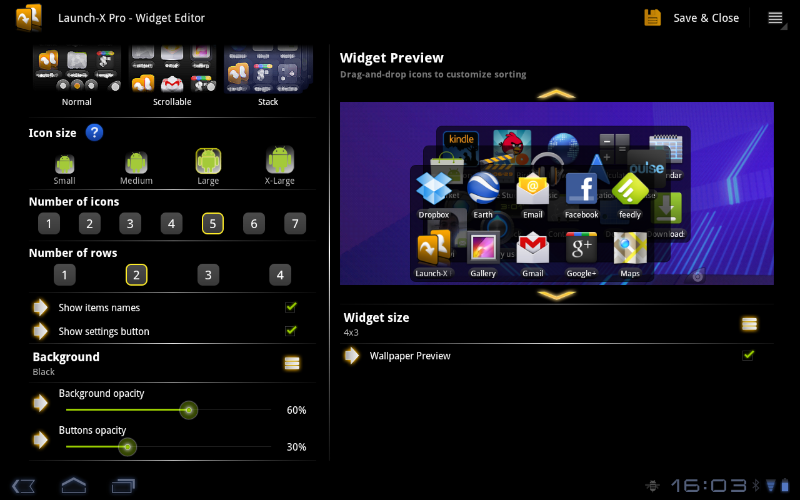
- Background Select your widget background color.
- Background opacity Select the transparency of the background. Set to 0 to completely hide the background.
- Buttons opacity Select the transparency of the buttons (applies to the arrows, direct and settings buttons).
In this example I've selected:
- Widget type Stack
- Widget size 4x3
- Icon size Large
- Number of icons 5
- Number of rows 2
You can immediately see the changes in the Widget Preview.
Just to play a bit more with the Widget Editor, let's add some more items to the widget, change the Background color to 'Black', and decrease the background opacity to 60%.
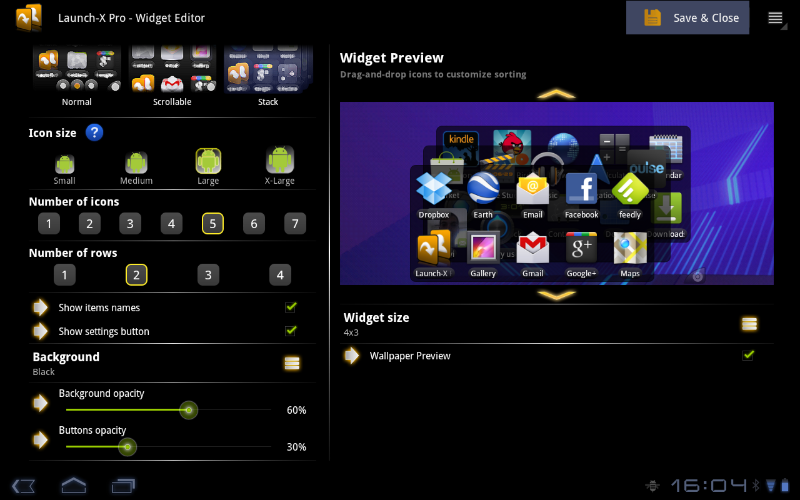
We are basically done! Now press the 'Save & Close' button to save your widget's configurations. This will take you back to the initial widgets list. Now there is only one widget, but you can create as many widgets as you like.
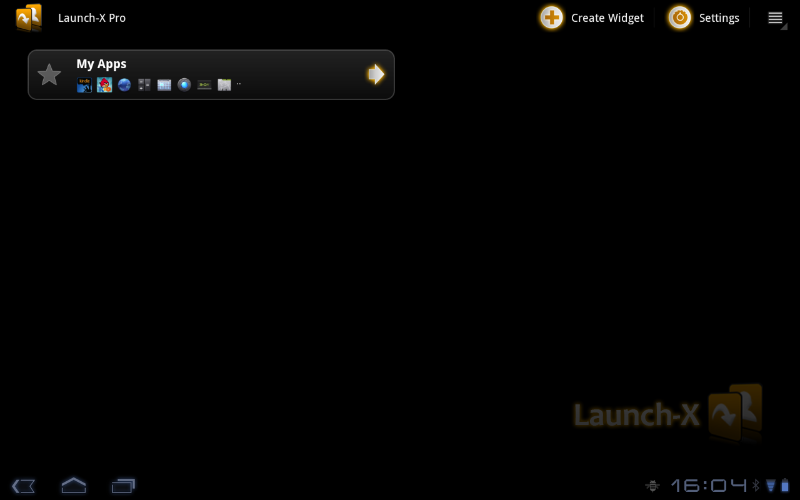
Let's finally add the widget to the homescreen! Press 'back' to quit the Launch-X application.
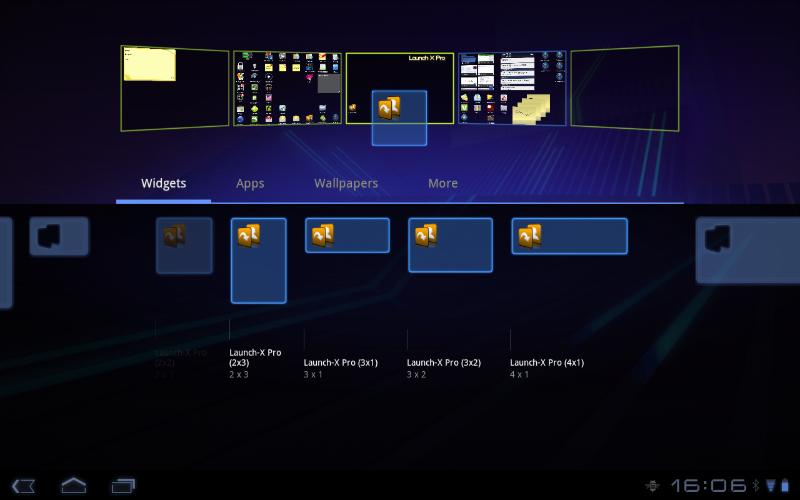
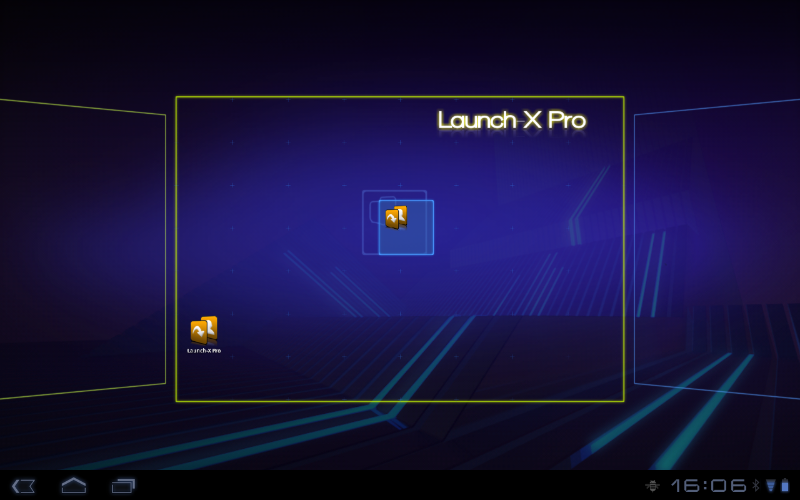
Now long-press a free space on your homescreen. Select 'Widgets', and then drag 'Launch-X' to your desired screen.
The created widgets in Launch-X will be shown on the next screen, where you can select the one to add to your homescreen.

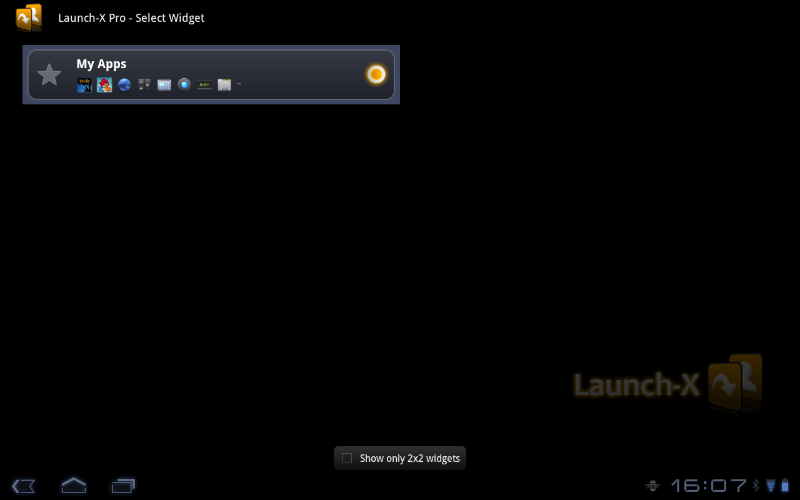

Done! The widget is now on your homescreen and you can start using it!

